
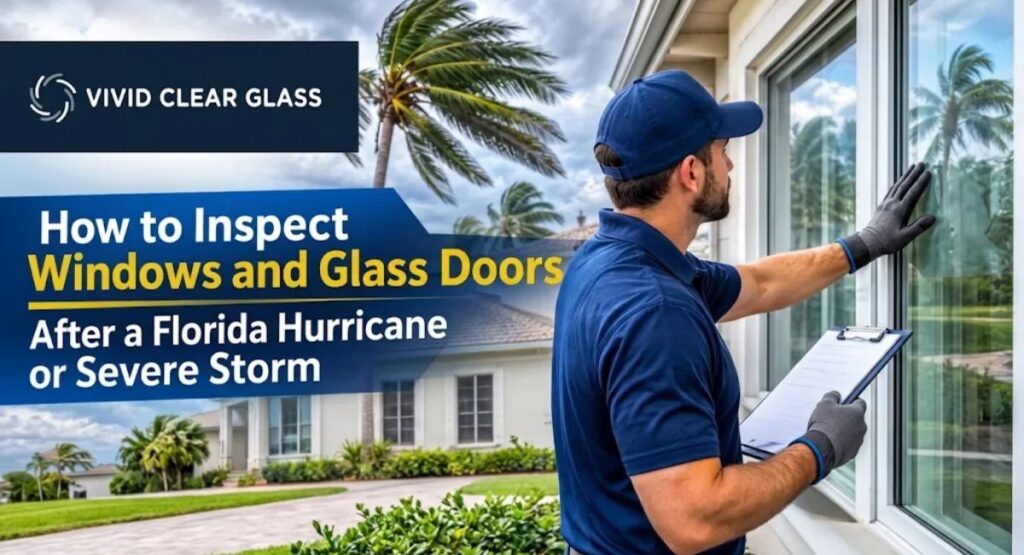
The wind has dropped. The rain has stopped. You walk outside and look at your home. Some windows look fine. Others look cloudy, scratched, or a little off. You wonder if the glass held up as well as it seems.
That moment matters. Storm damage is not always loud. A cracked pane is easy to spot. A broken seal, a bent frame, or a hidden leak is not. Small problems can grow into water intrusion, mold, and failed protection during the next storm.
This guide shows you how to inspect windows after a hurricane in a safe, simple order. You will learn what to look for, what to photograph, and when to call a professional. It is written for Florida homeowners, including those with impact windows and glass doors.
Start With Safety Before You Touch Anything
Do not rush to inspect. Your safety comes first.
Wait until local officials say it is safe to go outside. Hurricanes leave hazards that are easy to miss. These include downed power lines, loose roof material, standing water, and broken glass.
Basic safety rules
- Wear closed shoes with thick soles.
- Wear work gloves and safety glasses.
- Stay away from downed lines and anything touching them.
- Do not walk through standing water near electrical outlets.
- Keep children and pets away from the area.
- Do not lean on windows or doors that look loose.
Check for gas smells before you go near any damaged wall. If you smell gas, leave and call your utility company.
Also be careful with cracked glass. A cracked pane can fall without warning. Impact glass behaves differently from regular glass, and that comes up below. Still, treat every damaged pane as a hazard until someone has checked it.
Why a Window Inspection After a Hurricane Matters
Windows are the weak point in many building envelopes. A hurricane tests them in three ways.
First, wind pressure pushes and pulls on the glass. Second, flying debris strikes the surface. Third, wind driven rain pushes water into every small gap.
Florida homes face this often. Coastal areas like Miami deal with salt, humidity, and high wind every season. These conditions wear on frames, gaskets, and sealants even before a storm arrives.
A fast inspection helps you do four things:
- Spot safety risks early.
- Stop water from getting inside.
- Build a clear record for your insurance claim.
- Decide what needs a professional.
Waiting has a cost. Water that enters a wall cavity can cause rot and mold within days. Insurance carriers also expect homeowners to limit further damage. A prompt, documented check protects you on both fronts.
What You Need Before You Start
You do not need special tools. A basic kit is enough.
- A flashlight, even in daylight
- A smartphone or camera
- A notepad or notes app
- A tape measure
- A soft cloth
- Painter’s tape
- A small flat tool, such as a plastic putty knife
- Work gloves and safety glasses
Painter’s tape is useful. You can mark cracks, chips, and trouble spots without damaging the surface. It also makes your photos clearer.
Understand the Type of Glass You Have
Your inspection depends on the glass in your home. Florida homes often have one of three setups.
Impact glazing
Impact glazing is also called hurricane glass. It uses laminated glass. Two layers of glass bond to a clear plastic interlayer, often polyvinyl butyral (PVB). The interlayer holds the glass together when it breaks.
This design is why impact windows can crack and still stay in the frame. The glass may look shattered, yet the opening stays closed. That keeps wind and water out during the storm.
Impact glass is often part of a tested system. In Miami-Dade and Broward, products must meet the High Velocity Hurricane Zone (HVHZ) requirements of the Florida Building Code. They carry a Notice of Acceptance (NOA). The glass, frame, anchors, and sealant all work together.
Standard glass with storm shutters
Some homes use regular glass with accordion shutters, panel shutters, or roll down shutters. The shutters take the impact. The glass behind them may be undamaged. The shutters, tracks, and anchors need a check too.
Older or non-rated windows
Older homes may have single pane or basic double pane windows with no impact rating. These are more likely to crack or leak. They also pose more risk if the glass breaks.
Knowing which type you have helps you judge what is normal and what is not. A spiderweb crack in an impact pane looks alarming. It may still be doing its job. A crack in standard glass is a failure.
Step 1: Walk the Outside of the Home First
Start outdoors. Walk the full perimeter at a slow pace. Look at every window and glass door from a few feet away. Then look closer.
Look for visible glass damage
Check each pane for:
- Cracks, including thin hairline cracks
- Chips or pits from flying debris
- Shattered areas
- Bowed or warped glass
- Missing pieces
Use the flashlight at an angle. Side light makes small chips and scratches easier to see. Hold the light near the glass and look across the surface.
Look for storm debris
Storm debris often leaves clues. Look for:
- Tree branches against the glass
- Roof tile, gravel, or shingle pieces
- Metal sheeting or sign pieces
- Embedded fragments in the frame or glass
Photograph debris before you move it. It shows the cause of the damage. It also supports your claim.
Check the surrounding wall
Windows sit in a wall. If the wall shifts, the window suffers. Look at the stucco, trim, and siding near each opening. Watch for:
- New cracks running from window corners
- Gaps between the frame and the wall
- Loose or missing caulk
- Water stains below the window
Diagonal cracks at corners can point to frame movement. Note them and take photos.
Step 2: Inspect the Window Frames
The frame holds the glass and carries wind loads into the wall. Damage here is serious, even when the glass looks fine.
What to look for on aluminum frames
Most Florida impact windows use aluminum frames. Check for:
- Bends or twists
- Dents from debris
- Gaps at the corners
- Frames that look out of square
- Corrosion or white powder on the metal
- Loose or missing screws and fasteners
A bent frame can break the seal between the frame and the glass. It can also stop the window from closing correctly.
Check frame and wall contact
Press gently on the frame. It should feel solid. Any rocking or movement is a red flag. Look at the edges where the frame meets the wall. You should see a continuous, intact line of sealant.
Vinyl and wood frames
Vinyl frames can warp in heat or crack from impact. Wood frames can swell, split, or show soft spots from water. Press a fingertip near the lower corners. Soft wood often means moisture has entered.
Step 3: Check the Seals, Gaskets, and Sealant
Seals keep water out. They are small parts that do a big job. Wind driven rain tests them harder than anything else.
Types of seals on a window
- Perimeter sealant: A bead of caulk or sealant between the frame and the wall.
- Glazing gaskets or glazing tape: Rubber or vinyl strips that hold the glass in the frame.
- Weatherstripping: Strips along moving sashes and doors that close gaps.
- Insulated glass unit (IGU) edge seal: The seal around the spacer between two panes in a double pane unit.
How to identify damaged window seals
Look for these signs:
- Sealant that is cracked, split, or pulling away
- Gaps you can slide a fingernail into
- Gaskets that are loose, shrunken, or out of the channel
- Weatherstripping that is flattened or missing
- Daylight visible around a closed window
- Water marks on the inside sill or wall
Run your hand slowly around a closed window on a breezy day. You may feel moving air. Air movement often means water can get through as well.
Check the weep holes
Many frames have small weep holes along the bottom. They let trapped water drain out. Storm debris and dirt can block them. Clear them gently with a soft tool. Do not use sharp tools that could damage the frame.
Step 4: Look for Signs of Failed Double Pane Units
If your windows have insulated glass, check the edge seal. A broken seal lets moist air into the space between the panes.
Signs include:
- Fog or haze between the panes
- Water droplets inside the unit
- Mineral-like film that will not wipe off
- A rainbow tint in certain light
Wipe both sides of the glass with a soft cloth first. If the fog stays, it is inside the unit. That is a failed seal. The window may still be intact, but its insulation value drops. The unit usually needs repair or replacement.
Storm pressure and heat swings can stress these seals. A failure may show up days after the storm. Recheck the glass a week later.
Step 5: Inspect Impact Windows Closely
Many homeowners ask how to check impact windows after a hurricane. The answer is different from regular glass. A cracked impact pane can still be holding the opening closed.
What a damaged impact window can look like
- A spiderweb or star pattern of cracks
- A cloudy or milky patch in the glass
- Chips on the outer layer only
- A bubble or wave in the interlayer
- Edge delamination, where the layers start to separate
Do not assume a cracked impact window is safe. It may still be bonded. It may also have lost strength. The tested rating applies to intact glass. Cracks change that.
Outer layer versus inner layer
Impact glass has two layers of glass. The outer layer often takes the hit. You may see damage on the outside while the inside is smooth. Run a gloved fingertip across both sides. Note which side feels rough.
Damage on the outer layer only may be less urgent. It still needs a professional opinion. A cracked pane has less ability to take a second impact. Another storm could be close.
Check the interlayer edge
Look at the glass edge where it meets the frame. Cloudy, white, or bubbly edges can point to delamination. Moisture can enter at the edge. Over time this can spread.
Check the anchors and frame attachment
The glass is only part of the system. The frame must stay attached to the wall. Look for:
- Gaps between the frame and the opening
- Cracked stucco around anchors
- Movement when you press the frame
A window with sound glass and a loose anchor still fails under pressure.
Step 6: Inspect Glass Doors, Sliders, and Sidelights
Glass doors need their own check. They are large, and they handle more load.
Sliding glass doors
Check:
- Tracks for bends, dents, or debris
- Rollers, which should glide without grinding
- Locks and latches
- Gaps between the door panels and the frame
- Glass edges for chips
Try opening and closing the door. A door that sticks or jumps may have a bent track or a shifted frame.
Hinged and French doors
Check:
- Hinges for looseness
- Alignment at the top and the latch side
- Weatherstripping around the full edge
- Thresholds for cracks or water stains
Close the door and look for light around the edges. Any gap is worth noting.
Sidelights and transoms
Sidelights are the narrow windows beside a door. Transoms sit above. People forget them. Inspect them like any other window.
Step 7: Inspect the Inside of Every Window
Interior signs often show hidden problems. Walk inside each room and check every window and door.
Look for water intrusion
- Stains on walls, trim, or sills
- Peeling paint or bubbling drywall
- Wet carpet near windows
- Warped baseboards
- Musty smell
Check the corners and lower edges first. Water collects there.
Use a moisture check
If you have a moisture meter, take readings near the sill and the lower wall. High readings suggest water behind the surface. Without a meter, press the wall gently. Soft or crumbly drywall is a bad sign.
Test operation
Open, close, and lock each window. It should move smoothly. Check that:
- Locks engage fully
- Sashes sit flat
- Handles and cranks work
- Screens fit
A window that will not lock is a security risk. A window that will not close is a leak risk.
Step 8: Check Storm Shutters and Other Protection
If you use shutters, inspect them now. They may have protected the glass. They also may have been damaged.
Look at:
- Panel dents or cracks
- Bent tracks
- Loose or missing bolts and wing nuts
- Rust or corrosion
- Roll down shutters that jam
- Accordion shutters that no longer slide
Damaged shutters need repair before the next storm. Hurricane season in Florida runs from June 1 to November 30. Another event can follow quickly.
Step 9: Look for Surface Damage on the Glass
Not all storm damage is structural. Some of it is cosmetic. It can still hurt clarity, safety, and value.
Scratches and pitting
Wind driven sand, grit, and small debris can scratch glass. Fine scratches look like hazy lines. Pits look like tiny craters. Both are more visible in low sun.
Light scratches can sometimes be improved by professional restoration. Deep scratches are harder. You can read more in this guide on whether scratched glass can be repaired.
Salt film and water stains
Salt spray travels far inland during a hurricane. It dries on glass and leaves a white film. Rainwater mixes with minerals and leaves spots. These deposits can etch the surface if left too long.
A professional water stain removal service in Miami can treat mineral deposits without harming the glass. Do not scrub hard with abrasive pads. You can create scratches.
Paint, tar, and residue
Roof repairs and cleanup work often cause overspray and residue on nearby glass. Photograph it before you attempt to remove it.
What to Photograph and How to Document
Good documentation helps with insurance and repairs. Take your time with it.
A simple documentation routine
- Take a wide photo of each side of the home.
- Take a medium photo of each window or door.
- Take close photos of every crack, chip, stain, or gap.
- Place a coin or tape measure near damage for scale.
- Record the date and time.
- Write short notes for each location.
Label each file with the room and window number. A simple system works well. For example, “Kitchen window 1, cracked outer pane.”
Keep these records
- Photos and video
- Receipts for emergency repairs
- Product labels or stickers on the glass
- The NOA number or product approval, if you have it
- Contractor estimates
- Dates of all calls to your insurer
Take video too. Walk the home and describe what you see. This gives a full picture of the condition.
A Quick Reference Table: What You See and What It May Mean
| What you see | What it may mean | Suggested next step |
| Spiderweb cracks in impact glass | Outer layer broken, interlayer may be holding | Photograph and book a professional check |
| Fog between the panes | Failed insulated glass seal | Schedule unit repair or replacement |
| Cracked sealant at the frame | Water can enter the wall | Reseal soon and check for leaks |
| Bent aluminum frame | Structural stress, seal loss | Professional assessment |
| Stained wall below a window | Water has entered | Dry the area, test for moisture |
| Hazy lines on the surface | Scratches from grit or debris | Ask about glass restoration |
| White film on the glass | Salt or mineral deposits | Treat soon to avoid etching |
| Window will not lock | Frame shift or hardware damage | Repair for security and safety |
Temporary Steps to Limit Further Damage
You may need to protect the home before repairs begin. Do only what is safe.
For broken or cracked glass
- Cover the opening with plywood or heavy plastic sheeting.
- Use tape or screws to hold the cover in place.
- Keep people away from the area.
- Do not remove loose glass unless you can do it safely.
For leaks
- Move furniture and valuables away from the wall.
- Place towels and containers to catch water.
- Use a wet vacuum on standing water.
- Run fans and a dehumidifier to dry the area.
For frame or seal gaps
- Apply a temporary sealing tape or sealant.
- Do not seal weep holes.
- Keep the repair simple and reversible.
Keep receipts for temporary materials. Many policies cover reasonable emergency measures. Check your policy language or ask your insurer.
When to Call a Professional
A visual check has limits. You can see surface problems. You cannot see inside a wall or test a sealed unit.
Call a professional if you see any of the following:
- Cracks in impact glass
- Shattered or missing panes
- A bent, twisted, or loose frame
- Fog or moisture between panes
- Water inside the home near windows
- A window or door that will not close or lock
- Damage to anchors or surrounding stucco
- Scratches or etching you cannot clean
What a professional assessment includes
A trained glass and window specialist can:
- Test seals and measure gaps
- Check frame alignment and anchors
- Judge whether the glass still meets its tested rating
- Separate repairable damage from replacement needs
- Provide a written report for your insurer
Ask for a written estimate. It should list each window, the problem, and the fix.
Questions to ask a contractor
- Are you licensed and insured in Florida?
- Do you work with impact-rated products?
- Can you provide a written report for my claim?
- Which windows can be restored, and which must be replaced?
- What is the timeline?
Be careful after storms. Unlicensed contractors often go door to door. Verify a license before you sign anything. The Florida Division of Emergency Management lists current storm guidance and consumer resources at floridadisaster.org.
Repair, Restore, or Replace: How to Decide
Not every damaged window needs replacement. The right choice depends on the type of damage.
When restoration can work
Restoration may suit surface problems. These include:
- Light to moderate scratches
- Water spots and mineral stains
- Salt film and etching
- Residue and overspray
A custom glass restoration service can polish and clear many surface issues. It can cost far less than new glass. It also keeps the original window in place.
When replacement is the safer choice
Replacement is usually the better option for:
- Cracked impact or tempered glass
- Failed insulated glass units
- Deep scratches that affect strength
- Frames that no longer hold the glass tight
- Windows that have lost their tested rating
Read more in this breakdown of glass restoration versus replacement.
A simple comparison
| Situation | Restoration | Replacement |
| Light scratches | Often suitable | Rarely needed |
| Mineral stains and salt film | Suitable | Rarely needed |
| Cracked impact pane | Not suitable | Usually required |
| Failed double pane seal | Not suitable | Usually required |
| Bent frame | Depends on severity | Often required |
| Etched surface | Depends on depth | If clarity cannot be restored |
Let a professional make the final call. Safety and building code requirements matter here.
How to Protect Your Windows After the Storm
Once repairs are done, add protection. Good habits extend the life of your glass.
Clean the right way
Salt, dirt, and minerals build up fast in Florida. Rinse the glass with fresh water. Use a soft cloth or a squeegee. Avoid abrasive pads and harsh chemicals. They can damage glass and coatings.
Cleaning impact windows needs care. The frames, seals, and gaskets are sensitive to strong solvents. Use mild, non abrasive cleaners.
Consider a protective coating
A ceramic nano coating service for windows in Miami adds a thin, clear layer to the glass. It helps water bead and run off. It can reduce water spots and make cleaning easier. It does not make glass unbreakable. It is a surface treatment, not a replacement for impact protection.
Schedule seasonal checks
- Inspect sealant and weatherstripping before hurricane season.
- Clear weep holes each spring.
- Check shutters and tracks once a year.
- Recheck windows a week after any major storm.
Small, regular checks catch issues early. Early fixes cost less.
Common Mistakes Homeowners Make After a Storm
Avoid these errors.
- Skipping photos. Repairs erase evidence. Document first.
- Assuming cracked impact glass is fine. It may be compromised.
- Scrubbing stains with abrasives. This creates new scratches.
- Sealing weep holes. Trapped water causes damage.
- Waiting too long. Moisture grows quickly in Florida heat.
- Hiring the first contractor who knocks. Check licenses and references.
- Ignoring small gaps. Small gaps let in a lot of water.
- Throwing away damaged parts too soon. Your insurer may want to see them.
A Realistic Example
Picture a homeowner in Miami after a strong tropical storm. The impact windows look fine from the street. During the walk around, they notice a faint star crack in one bedroom window. The pane is still in place.
Inside, a thin stain runs down the wall below the sill. The sealant on the outside has pulled away at one corner. A light touch shows the frame has a small amount of movement.
The homeowner takes photos, places painter’s tape around the crack, and covers the area with plastic sheeting. They call a glass professional and their insurer on the same day. The inspection finds a damaged outer layer and a failed perimeter seal. The pane is replaced, the frame is resealed, and the wall is dried and repaired.
Nothing in this story was dramatic. A careful walk and a quick call kept a small problem from becoming a large one.
Your Post-Storm Window Inspection Checklist
Use this short list as a quick guide.
- Confirm the area is safe.
- Photograph the exterior of the home.
- Check each pane for cracks, chips, and haze.
- Inspect frames for bends and gaps.
- Check sealant, gaskets, and weatherstripping.
- Look between the panes for fog.
- Test doors, tracks, and locks.
- Check inside for water stains and soft spots.
- Inspect shutters and tracks.
- Document everything and keep receipts.
- Call a professional for cracks, leaks, or frame damage.
Final Thoughts
A hurricane puts windows and glass doors under heavy stress. The damage is not always obvious. A calm, step by step inspection shows you what happened and what to do next.
Start with safety. Look at the glass, the frame, and the seals. Check inside for water. Document everything. Then bring in a professional for anything that affects strength, security, or water protection.
If your glass has scratches, mineral stains, or salt etching after a storm, the team at Vivid Clear Glass can help. Review the full range of glass restoration services in Miami or contact us to schedule an assessment before the next storm arrives.